Climbing is the best full-body workout. But while we strengthen muscles, it's mainly the ligamentous structures that have to withstand a lot. We'll show you how to provide support with the right tape if the worst comes to the worst.
Muscles adapt more quickly to movement than tendons, ligaments, cartilage and capsules. And it is precisely these last four that make climbing difficult for us if they are injured.
When to tape?
Taping should be done when you are injured and in pain! Not prophylactically and certainly not out of habit.
Why? Quite simply: if you have healthy legs, you don't go to work on crutches, do you? Tape has exactly the same function as a crutch: it takes some of the load off your fingers. The joints get used to the support and become weaker overall.
This is precisely why you should make sure that you don't use tape when warming up, for example - if it's not acute - but only when you're really pushing yourself to the limit. Only if you can, of course.
If you can't do without tape?
In the following, we would like to introduce you to the most common injuries and suitable taping methods.
Skin injury - tape on a flapper
The "flapper" protects the skin from further injury, photo: Martina Scheichl
Tear off about 15 cm of the tape, it should be wider than your wound. Fold it over at the beginning so that the non-adhesive side is placed on the cut or flapper. If possible, always stick the protruding skin to the wound first, then the tape over it.
Tip: Do not wrap it too tightly around the joint, as it only serves to protect the skin and not to stabilize the joint.
Ring ligament injuries - H-Tape
Injuries to the annular ligament are the most common injuries suffered by climbers (alongside soft tissue injuries such as cuts) and occur almost exclusively in climbing sports. Due to the predominantly "upright finger position", there is a high pressure load on the annular ligament apparatus. This can lead to ligament strain or rupture. Symptoms manifest as localized pressure pain with swelling of the proximal phalanx, sometimes with a small haematoma, and the tendon protrudes when the flexor tendon is strained against resistance.
The H-Tape relieves and supports the injured ligament so that the tendons do not move away from the bone.
Tip: Make the H right at the beginning of the tape. This makes it easier to apply.
The H-tape supports the annular ligament, photo: Martina Scheichl
Choose a strip of tape about 12 mm wide and about 12 cm long and tear it in the middle from both sides. Leave a bar that forms the so-called "H".
Place the strip on the joint on the inside of the hand, first attach the small strips before you start wrapping the long ones around the injured joint. Make sure that you don't tape too tightly, as this will prevent you from pushing the joint out of its neutral position or reducing the blood flow.
H-tape can also be applied in the same way for tendinitis.
Offended middle finger joint
Pain in the metacarpophalangeal joint can have multiple triggers such as capsular strains, capsulitis, flexor tendon strains or lumbricalis tendon injuries.
If the diagnosis is not clear, you can try to protect the joint with tape. Indications for taping include a painful and swollen joint, pain during longitudinal pulls and pain on the extensor side in the event of joint effusion. When applying the tape, care must be taken to ensure that the joint has sufficient flexion and extension function.
A painful middle finger joint can be spared a little with tape, photo: Martina Scheichl
Keep the finger bent at an angle of around 30 degrees during the entire taping process. Wrap the finger with tape starting at the base joint. On the inside of the hand, place the tape crosswise over the middle joint, then wrap around the phalanx before crossing back down and circling the finger again.
Tip: An alternative for capsule injuries is buddy tape, where the affected finger is taped to its neighboring finger, below the joint and above the joint. However, this tape is relatively impractical when climbing.
Tendon injuries - wrist and elbow
Tendon strains mainly occur in hanging finger positions, when the finger "hangs" on a small edge of a grip. This results in increased static friction, which builds up force peaks that lead to an elongation of the tendon tissue, i.e. a tendon strain, when the foot suddenly slips away, for example. The healing process is long (3 to 4 months). The tape can be applied to the wrist and elbow for support. These tape variants are described below.
Tape in the wrist area
Pain occurs in the wrist due to the pull of the flexor tendons.
Wrist tape, photo: Martina Scheichl
For the tape, use two strips of tape about 15 mm wide and about 8-10 cm long (the length depends on the circumference of the wrist).
Stick one tape under your wrist, then take the second one and stick it on the other side. The strips must overlap.
As the tapes are not applied end-to-end, sufficient elasticity is ensured and the blood flow is not disturbed.
Elbow tape
Elbow tape can also have a supportive effect on tendon injuries. To do this, apply the tape continuously below the elbow.
Elbow tape, photo: Martina Scheichl
Caution! As there is a high level of muscle tension in this area when climbing, the tape must be applied really loosely so that the muscles can contract and blood flow is guaranteed.
General tape instructions Never apply the tape too tightly! This disturbs the blood flow.When applying the tape, make sure that you do not move the joint from its neutral position. Especially if you fix the tape to the side, you may exert too much tension and cause the joint to move sideways.Choose thin strips. This has the advantage that the tape can be applied more precisely and that it does not come off so easily over the entire surface during climbing. Nothing is more annoying than tape that comes loose during climbing. Which tape is the best?
Many suppliers, many botchers!
We still rely on good old Leuko tape from the pharmacy. It is tear-resistant, doesn't give much and sticks well.
And what's more
It's best not to be injured! Therefore:
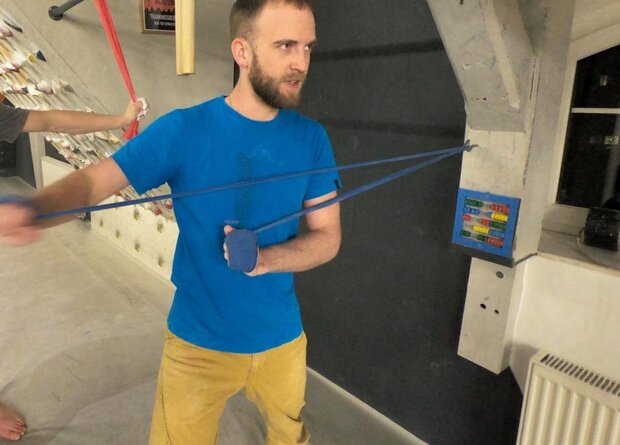
Warm up your fingers well. The best way to do this is with a kneading donut, for example from Black Diamond.Ensure balance: Many injuries occur because there are imbalances somewhere else, for example in the elbow. This is because we have kinetic chains in the body that all work together. If you notice that your elbow or shoulder pinches, it's a clear sign that something is wrong and this pain is often followed by a broken finger. Take a look at our article on compensation exercises.
The tape is intended as support for injuries! If you still have pain with tape, then you should stop climbing. If you ignore pain, you are playing with inflammation or chronic pain, which will take much longer to recover from than a 3-week immobilization.
I speak from experience: only do what does not cause you pain, otherwise rehabilitation can be laborious and protracted!